Table of contents
Being New to coding I can tell you how difficult it can be to find your way around it and to understand some certain apps and software you will be introduced to. Expo dev is one of those if without proper guidance you could also get lost and that is where I come in
Expo is an open-source platform for making universal native apps for Android, iOS, and the web with JavaScript and React. Is a developer tool for creating experiences with interactive gestures and graphics, using JavaScript and React Native. If you are new to mobile development, the easiest way to get started is with Expo Go. Expo is a set of tools and services built around React Native and, while it has many features, the most relevant feature for us right now is that it can get you writing a React Native app within minutes. You will only need a recent version of Node.js and a phone or emulator.
Let’s jump right into it.
Requirements
To use Expo, you need to have the following tools installed on your machine:
Node.js LTS release — Only Node.js LTS releases (even-numbered) are recommended.
Git for source control.
Watchman (for Linux or macOS users).
Recommended tools
Yarn for faster and more reliable dependency management. Use this instead of
npmandnpx.VS Code Editor and VS Code Expo Extension for easier debugging and app config autocomplete.
PowerShell (the default terminal in VS Code) or Bash via WSL for developers who prefer Windows.
Once you have installed all of the above, we can move to create an expo application
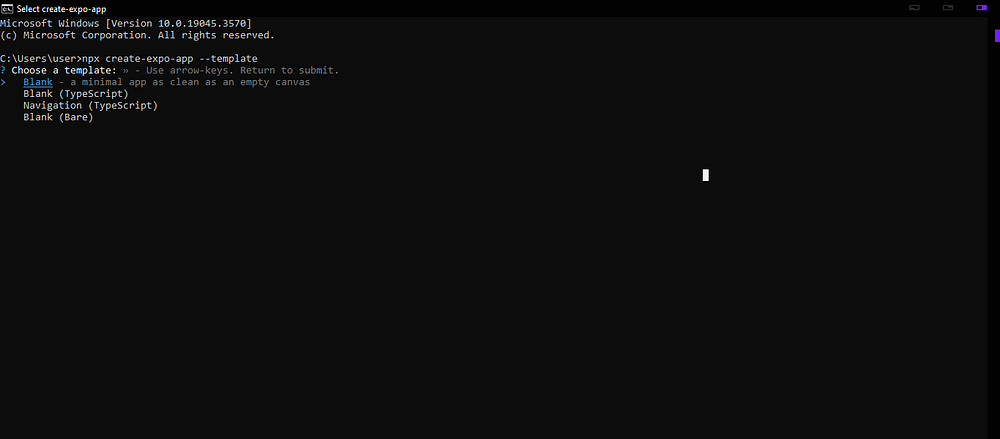
First, you will open the terminal on your device. In Windows, that is the Command prompt. Then you run the command;
npx create-expo-app --templateThis will bring out template options giving you the choice to pick how the app should be like.
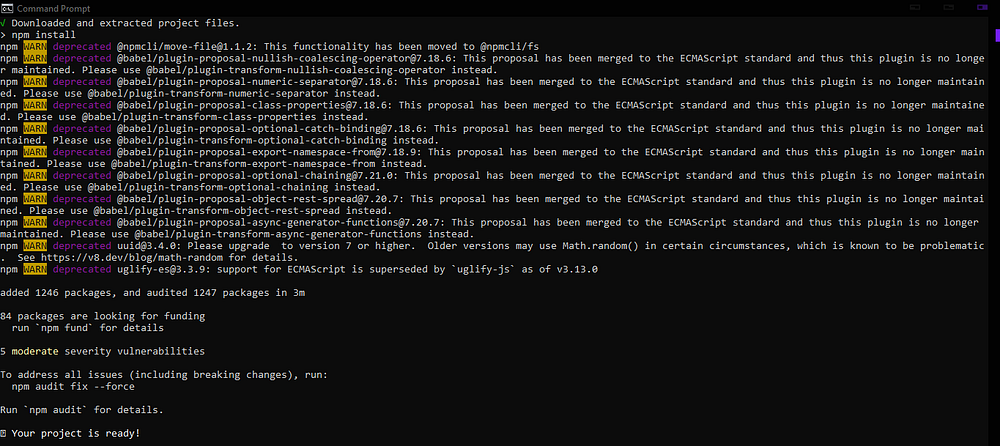
Since we are just starting, let us choose the blank template option by pressing enter which will lead us to a point where we are required to name our app. Let’s call it my-rapi. The name is weird but let’s just go with that. When you do that and press enter a process will begin, it is called npm install. You don’t need to worry about it, it will do that for you and will look something like this;
After that is done, we run another command to get to the ending stages of what we are trying to do, which is;
npx create-expo-app my-ripa && cd my-ripaJust for added knowledge cd means Change directory. In Simple terms, it’s a command that allows you to move the folder to different places. For example, if we put cd Desktop, the folder will be moved to your desktop and then if you run through the command ls it will show all that’s in the folder. Back to our topic.
When you are done with that and have downloaded all the necessary. We can start to use it and to start, we have to use the run with a metro bundler. A prerequisite before we can start. The command to initiate this;
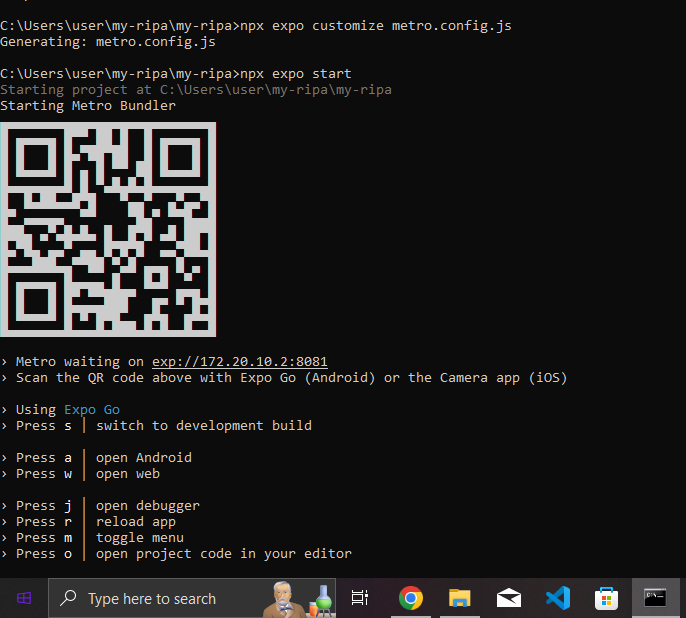
npx expo customize metro.config.js
After we run that it will say Generating; metro.config.js
Then now we can start working on it by running the command
npx expo start
That will to the metro bundler generation which leads to a QR code that will look something like this;
After this has been done we download an app on our phone called Expo Go and then when you do that, you use the camera on your phone to scan the code which redirects you to the app and you can start playing with it then.
Now In case you scan the QR code on Expo Go it says This is taking much longer than it should. No worry there is an alternative. I also ran into this problem. To make things simpler for us we will download an Android simulator on our device so that everything can be done there.
Genymotion
Genymotion is an Android emulator “as a service” on the Cloud, as images for Cloud providers and locally for PC and Mac. It is like having a phone on your PC and with it you can work directly on one device.
Click the link above and then Click on Product, press on Download, and follow the instructions to Download it and Create an Account and follow through with the instructions. When you do all that you will see a plus button which will give you a variety of devices that can be simulated on your PC
When you are done with all that we can move to setting it up and using it.
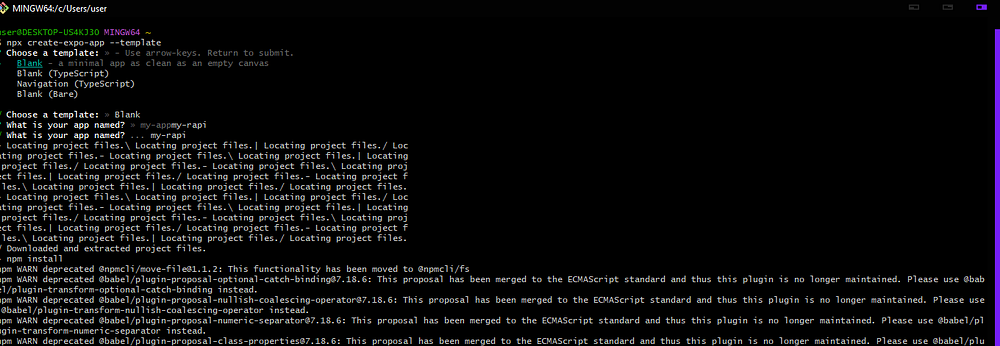
Let us now open Git Bash and set it up using the same process we use in Command prompt and follow the same process we used the first time only with some slight differences. Let’s get right into it.
Before we forget, We will open a folder and name it my-rapi so all the files downloaded or extracted will be in there. Now we move.
We start by running the command;
npx create-expo-app --template
- We then type our app name which is my-rapi and it will start installing all the necessary needed. After that has been done, you see your project is ready. It will show us some commands that we need to run to complete the process.
So let us run
cd my-rapi
- And then run
npm run android
Before I forget which I personally just did. Make sure you completely Login into your Genymotion so that when we are done setting up in Git Bash it will just open automatically. Back to the main discussion
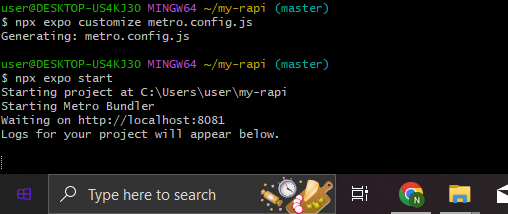
After inputting the run android command, you then go ahead to run the Metro Bundler command as it serves as a prerequisite for the Expo start command
npx expo customize metro.config.jsThen we run the Expo start Command
npx expo start
The Reason mine is saying Waiting on local host is because I had not finished setting up my Genymotion which is the simulator is trying to run on.
When you however set it up completely, the system automatically open up the app and will say by default “Open up App.js to start working on your app!” then you go to VScode and open up the file there and there you can begin to play around with it to see how it works
Thank you for Reading!

